How to Use Instant Pot | Complete Beginner’s Guide
How to use Instant pot ? This was the first question I had in mind back in 2018 when I got my first instant pot. I am sure most of you who have got their first instant pot would want to same. So here’s my Instant pot 101, a complete instant pot beginner guide which answers most of basic things you need to know like what is instant pot, How instant pot works and how to use an instant pot like a pro.

What’s in This Guide
So you finally bought an Instant Pot. Maybe it was a holiday gift. Maybe you grabbed one during a sale. Or maybe you’ve been eyeing it for months, watching everyone rave about dump and go dinners and perfectly cooked beans.
Now it’s sitting on your counter, and honestly? It looks a little intimidating.
I get it. When I first unboxed my Instant Pot, I stared at all those buttons and thought, What have I gotten myself into? Would I ruin dinner? Would I ever figure out what natural release means?
Here’s the good news: the Instant Pot is actually incredibly safe and surprisingly simple once you understand the basics. And that’s exactly what this guide is for.
Whether you’ve never touched a pressure cooker in your life or you’re just looking for a refresher, you’ll feel confident enough to make your first Instant Pot meal tonight.
What Is an Instant Pot ? Instant Pot For Beginners
An Instant Pot is an electric multi cooker that combines several kitchen appliances into one. At its core, it’s a pressure cooker, but it can also work as a slow cooker, rice cooker, steamer, yogurt maker, and more depending on your model. Many models come with bake, grill and air fry features too.
Main function is pressure cooking. The Instant Pot seals in steam, which builds pressure inside the pot. That pressure raises the boiling point of water, which means food cooks at higher temperatures than normal. This means, the Meals that would normally take hours are done in a fraction of the time.

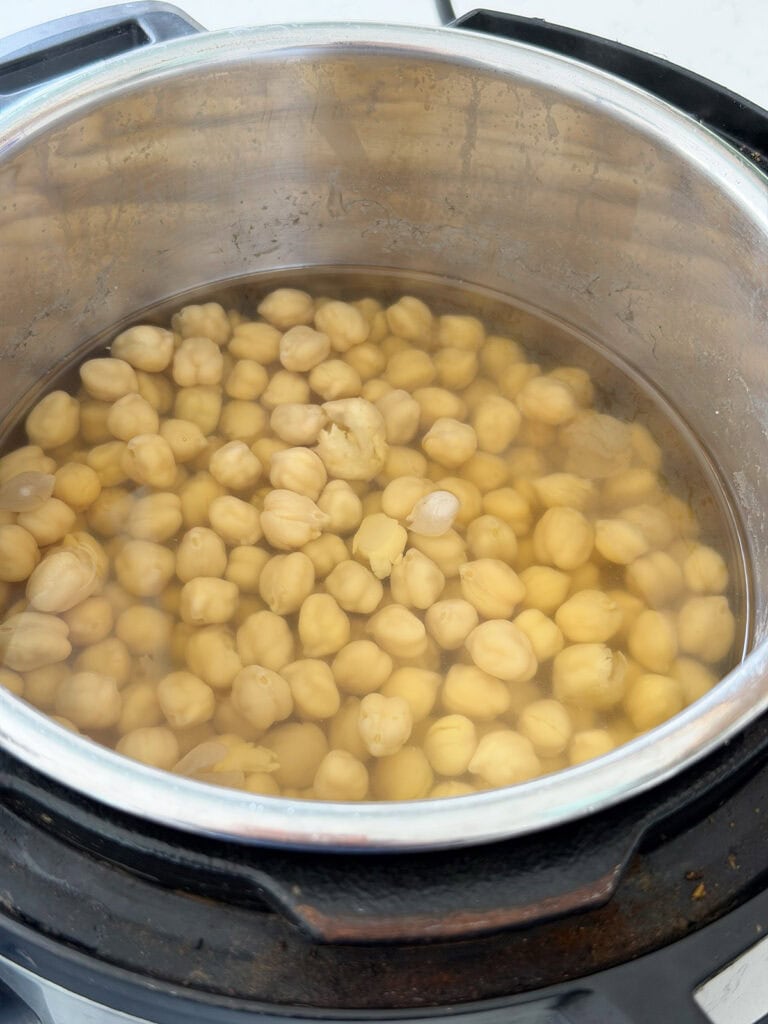
- Dried beans that usually take 2+ hours? Ready in 30-40 minutes.
- A soup that normally simmers all afternoon? Done in 20 minutes.
- Low and slow dishes like stews and curries? Finished in under an hour with the same depth of flavor.
For busy people trying to get healthy, homemade dinners on the table without spending hours in the kitchen, the Instant Pot is genuinely life changing. It’s not hype it’s just physics working in your favor.
Which Instant Pot Should You Buy?
If you’re still shopping for or wondering which instant pot you should buy, you can see my recommendations based on most of home usage requirments.
For Most Home Cooks: Instant Pot Duo 6-Quart This is the classic. It handles everything a family of 2-4 needs, fits easily on most countertops, and has all the essential functions without being overwhelming. If you’re just starting out, this is my top recommendation.
For Larger Families or Meal Preppers: Instant Pot Duo 8-Quart If you’re cooking for 5+ people or you like to batch cook and meal prep, the extra capacity is worth it. Just know it takes a bit longer to come to pressure because there’s more space to heat.
For More Features: Instant Pot Duo Plus or Pro These models add a few extras like a sterilize function, cake setting, and a more precise display. Nice to have, but not essential for beginners.
If you are an instant pot beginner, start with the Insant pot 6-quart Duo. You can always upgrade later, but most people find it’s all they ever need.
As an Amazon Associate I earn from qualifying purchases at no extra cost to you.
Know All About Instant Pot Parts
Before you start cooking, let’s get familiar with what you’re working with. Once you know all of these parts rest everything else will click.
The Main Components
1. The Base Unit (Housing): This is the outer pot that plugs into the wall. It contains the heating element and all the electronics. Important rule: Do not expose this part to water. Never submerge it, never put it in the dishwasher. Just wipe it down with a damp cloth when needed.
2. The Inner Pot (Stainless Steel Insert): This is the removable pot where your food actually goes. It lifts right out of the base. You can wash this in the dishwasher or by hand. Always make sure the outside is dry before placing it back in the base.
Pro tip: Never turn on your Instant Pot without the inner pot in place. It sounds obvious, but in a rush, it happens. You’d be pouring ingredients directly onto the heating element. Not good.
3. The Lid The lid locks onto the base and creates the airtight seal needed for pressure cooking. It has several important parts:
- Sealing Ring: The silicone gasket that fits inside the lid. This creates the seal. It’s removable for cleaning and should be replaced every 12-18 months or if it gets warped, cracked, or too smelly. Instant Pot Sealing Ring 2-Pack
- Steam Release Valve (Venting Knob): The switch on top of the lid that you turn to Sealing or Venting. During pressure cooking, it must be on Sealing. When you want to release pressure quickly, you turn it to Venting.
- Float Valve: The small metal pin that pops up when the pot reaches pressure and drops down when pressure is released. This is your visual indicator. If it’s up, there’s still pressure inside don’t try to open the lid.
- Anti-Block Shield: The small metal cap on the underside of the lid that covers the steam release pipe. It prevents food from clogging the vent. Remove it and clean it after each use.
4. The Condensation Collector That little plastic cup that hooks onto the back of the base. It catches water that drips down the outside of the pot. Easy to forget, but empty it occasionally or it overflows onto your counter.
5. Power Cord Most newer Instant Pots have a detachable power cord, which makes storage easier.
Quick Parts Checklist Before Cooking
Every time you cook, do a 10-second check:
- Inner pot is inside the base
- Sealing ring is properly seated in the lid (push it in all the way around)
- Steam release valve moves freely
- Float valve moves up and down freely
- Anti-block shield is in place
This takes seconds but prevents most common problems.
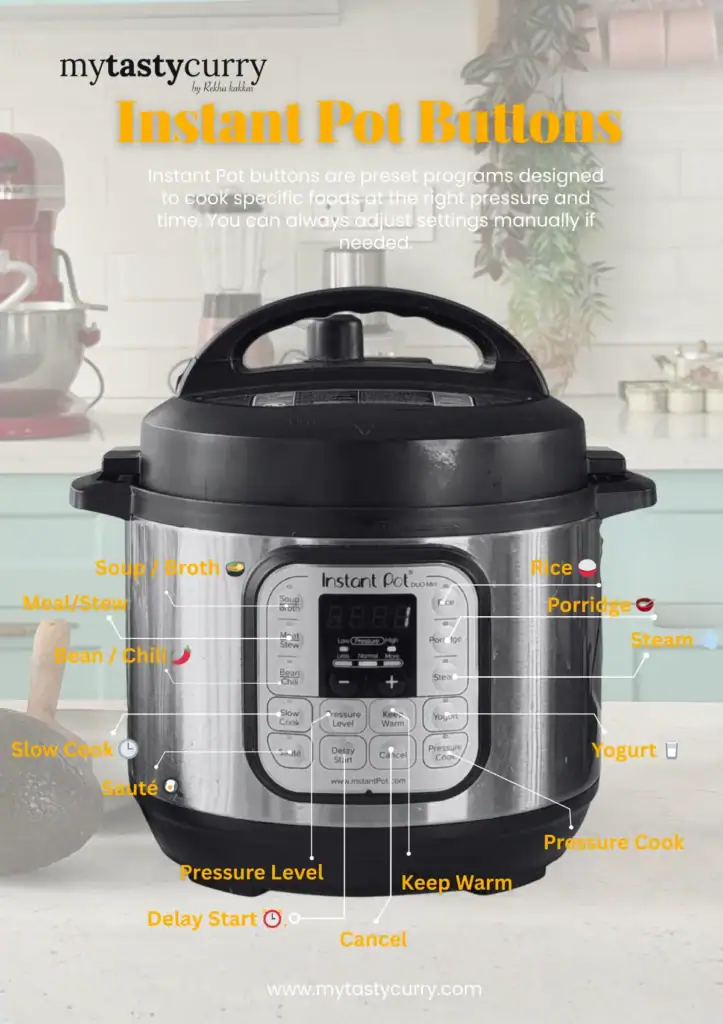
Instant Pot Buttons: How to Use Instant Pot
Those rows of buttons can look overwhelming, but here’s a secret: you really only need to know a few of them to make 90% of recipes. Here’s how to use Instant Pot buttons for specialised cooking techniques.
The Buttons You’ll Use Constantly
Pressure Cook (or Manual) This is your go-to button. It lets you set a custom time for pressure cooking. On older models, it’s labeled Manual. On newer ones, it says Pressure Cook. Same function.
When you press it, the default is usually High Pressure for 30 minutes. Use the +/- buttons to adjust the time to whatever your recipe calls for.
Sauté This turns your Instant Pot into a skillet. The lid stays off, and you can brown onions, sear vegetables, toast spices, or simmer sauces. Three heat levels: Less, Normal, and More. Press the Sauté button multiple times to cycle through them.
Use More for browning and searing. Use Normal for general sautéing. Use Less for gentle simmering.
Keep Warm/Cancel This button does two things:
- During cooking, pressing it cancels the current program
- After cooking, it keeps food warm (the pot switches to this automatically)
I press Cancel constantly to stop Sauté mode before pressure cooking, or to turn off Keep Warm when I’m done.
Timer (+/- Buttons) These adjust the cooking time. Simple.
Buttons You’ll Use Sometimes
- Steam For steaming vegetables, dumplings, or anything in a steamer basket. Uses high pressure with continuous heat. The timer starts immediately (unlike Pressure Cook, which waits until pressure is reached).
- Slow Cook Turns your Instant Pot into a slow cooker. Three settings: Less (low), Normal (medium), More (high). Note: Instant Pot slow cooking runs a bit cooler than traditional slow cookers, so you may need to adjust times.
- Rice Automated setting for white rice. It’s fine, but honestly, I usually just use Pressure Cook with my own timing for more control.
- Bean/Chili Pre programmed for cooking beans and legumes. Works well, but again, Pressure Cook with manual timing gives you more precision.
Buttons You Can Mostly Ignore For Now
- Yogurt: For making homemade yogurt. Great if you’re into that, but not essential.
- Porridge: For oatmeal and congee.
- Meat/Stew, Poultry, Soup: Pre-programmed settings. They work, but they’re not vegetarian focused, and manual control is more flexible anyway.
- Cake, Egg, Sterilize: Found on some models. Nice extras, not necessities.
My Honest Advice on Buttons
Learn these three of instant pot buttons well and you can make almost anything:
- Pressure Cook: for the main cooking
- Sauté: for browning before and thickening after
- Cancel: to stop and switch between modes
That’s it. Don’t let the button panel intimidate you.
The Instant Pot Water Test: Your First Test Run
Before you cook real food, do the water test. This teaches you exactly how the Instant Pot works with zero risk of wasting ingredients or making a mess.
Water Test Steps
- Step 1: Add Water Pour 3 cups of water into the inner pot.
- Step 2: Check the Sealing Ring Make sure the silicone ring is properly seated inside the lid. Run your finger around it to confirm it’s in the groove all the way.
- Step 3: Lock the Lid Place the lid on the pot and turn it clockwise until it clicks into place. You’ll feel it lock.
- Step 4: Set the Valve Turn the steam release valve to Sealing (not Venting). This is the most commonly forgotten step for beginners.
- Step 5: Start Pressure Cooking Press Pressure Cook (or Manual), then use the +/- buttons to set the time to 5 minutes.
- Step 6: Wait for Pressure Now the Instant Pot will:
- Start heating the water
- Generate steam
- Build pressure (you’ll hear hissing, see steam puffs — that’s normal)
- The float valve will pop UP when sealed
- The display will start counting down from 5:00
- This coming to pressure phase takes 5-15 minutes depending on how much liquid and how full the pot is. This time is NOT included in recipes. When a recipe says cook for 10 minutes, that’s just the countdown time not the pre-heating.
- Step 7: Cooking Complete Natural Release When the timer hits 0:00, the pot beeps and switches to “Keep Warm.” The display shows L0:00 and starts counting up that’s how long it’s been on Keep Warm.
- For this test, let the pot sit for 10 minutes without touching anything. This is called Natural Pressure Release the pressure drops slowly on its own. You’ll notice the float valve eventually drops down.
- Step 8: Quick Release the Remaining Pressure After 10 minutes, carefully turn the steam release valve to Venting. Stand back hot steam will shoot out. This is normal. Wait until the steam stops completely and the float valve is fully down.
- Step 9: Open the Lid Turn the lid counter clockwise to unlock. Always open it away from your face (steam rises).
Congratulations! You just completed your first Instant Pot cycle. You now understand:
- How long it takes to come to pressure
- What natural release feels like
- How to do a quick release safely
- That the Instant Pot won’t explode (told you!)
Natural Release vs Quick Release: When to Use Each
This is one of the most confusing parts for beginners, but it’s actually simple once you understand the why.
Quick Release (QR)
What it is: Turning the steam release valve to “Venting” immediately after cooking ends. Steam shoots out rapidly, and pressure drops in 1-2 minutes.
When to use Quick Release in Instant Pot:
- Vegetables (to prevent overcooking)
- Pasta (to stop it from getting mushy)
- Anything where timing is critical
- When a recipe specifically calls for QR
Tips:
- Use a long wooden spoon or towel to turn the valve keep your hand away from the steam
- If liquid sputters out, close the valve, wait 30 seconds, then try again
- Never put your face over the valve
Natural Release (NR or NPR)
What is Natural Release: Leaving the pot alone after cooking and letting the pressure drop on its own. Takes 10-30 minutes depending on how full the pot is.
When to use it:
- Beans and legumes: quick release makes them split and get mushy
- Large quantities of liquid like soups, stews
- Grains like rice and quinoa
- Whenever you have the time it’s gentler on food
Variations:
- Full Natural Release: Wait until the float valve drops completely on its own
- 10-Minute Natural Release (10 NR): Wait 10 minutes, then quick release any remaining pressure. This is the most common method.
The Simple Rule
Delicate foods (vegetables, pasta, eggs) → Quick Release Sturdy foods (beans, grains, stews) → Natural Release When in doubt → 10-minute natural release, then quick release
I have a complete guide on Natural Release vs Quick Release with specific examples if you want to go deeper.
Instant Pot Safety: What You Actually Need to Know
Modern electric pressure cookers like the Instant Pot have 10+ safety mechanisms. They’re designed so that the lid literally cannot open while there’s pressure inside. Your grandmother’s stovetop pressure cooker horror stories don’t apply here.
That said, there are some common-sense rules to follow:
Do’s
✅ Always add enough liquid. Most recipes need at least 1 cup of liquid (water, broth, sauce) to generate steam. Without liquid, the pot can’t build pressure and may give you a burn warning.
✅ Check the sealing ring every time. A warped or improperly seated ring = no seal = no pressure = frustrated you.
✅ Keep the steam release valve clean. Food particles can clog it. Remove and rinse after cooking messy dishes.
✅ Release pressure before opening. The lid is locked while the float valve is up. Never force it.
✅ Keep your face and hands away from steam. Steam is hotter than boiling water. Use a long utensil to turn the valve.
Don’ts
❌ Don’t overfill. Maximum fill line is there for a reason. For foods that expand (beans, rice, grains), don’t go past the halfway mark.
❌ Don’t pressure cook with only thick sauces. Pure tomato sauce, coconut cream, or thick curry paste without enough thin liquid will scorch. Always layer thin liquid at the bottom.
❌ Don’t deep fry. Instant Pots aren’t designed for pressure frying with oil.
❌ Don’t ignore the burn warning. If you see “BURN” on the display, cancel immediately, release pressure, check the bottom for stuck food, add more liquid, and try again.
❌ Don’t use damaged equipment. Cracked inner pot, warped sealing ring, or faulty valve? Replace them before cooking.
Essential Accessories for Safe, Easy Cooking
A few inexpensive add-ons make Instant Pot cooking safer and more convenient:
Silicone Mini Mitts The inner pot and lid get HOT. These protect your hands when lifting. Silicone Mini Mitts
Extra Sealing Rings Keep a spare on hand. Also useful to have separate rings for savory vs sweet dishes (the silicone absorbs odors). Sealing Ring 2-Pack
Steamer Basket Essential for steaming vegetables without submerging them. Stainless Steel Steamer Basket
Glass Lid For slow cooking or using Keep Warm mode when you don’t need the pressure lid. Tempered Glass Lid
As an Amazon Associate I earn from qualifying purchases at no extra cost to you.
Your First Real Instant Pot Recipe: Start Here
Now that you understand how your Instant Pot works, it’s time to cook something delicious.
I recommend starting with something simple, forgiving, and hard to mess up. Here are my top three suggestions for beginners:
Option 1: Instant Pot Vegetarian Chili
A dump-and-go recipe that’s perfect for beginners. Everything goes in one pot, pressure cooks for 15 minutes, and you have a hearty dinner that feeds the whole family. Get the Recipe: Instant Pot Vegetarian Chili →
Option 2: Instant Pot Lentil Soup
Lentils are incredibly forgiving in the pressure cooker. This Greek-style version with lemon and herbs is simple, healthy, and makes fantastic leftovers. Get the Recipe: Instant Pot Lentil Soup →
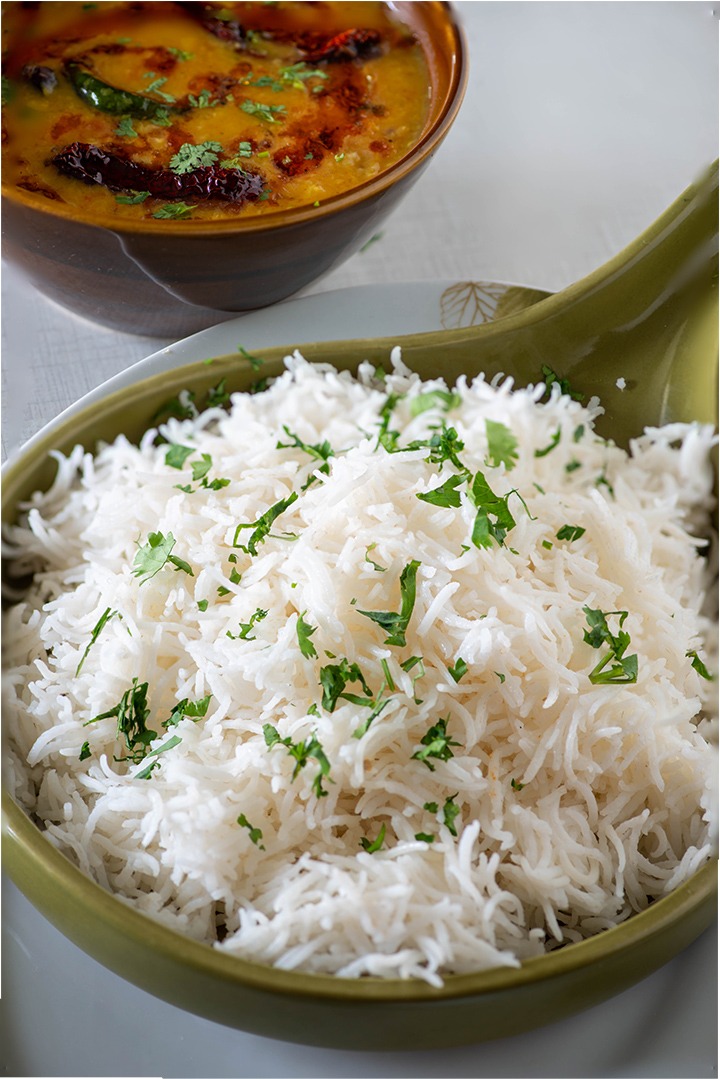
Option 3: Basic Instant Pot Rice
Master the basics. Perfect fluffy rice every time, with exact ratios and timing. Get the Guide: Instant Pot Rice (Foolproof Method) →
Want More Ideas?
Check out my full collection of Instant Pot Vegetarian Recipes — from quick weeknight dinners to meal prep favorites, all tested and perfected for the pressure cooker.
10 Common Instant Pot Mistakes (And How to Avoid Them)
After helping thousands of home cooks get comfortable with pressure cooking, these are the mistakes I see over and over:
1. Forgetting to set the valve to Sealing The #1 beginner error. Your pot will heat forever, steam will leak out, and nothing will cook. Always check the valve before walking away.
2. Not using enough liquid The Instant Pot needs steam to pressurize. No liquid = no steam = no pressure. Minimum 1 cup for most recipes.
3. Ignoring the preheat time Recipes say “cook for 10 minutes” but you’re waiting 20+ minutes. That’s normal! The pot needs 5-15 minutes to come to pressure first. Budget for it.
4. Overfilling the pot Past the max line? You’re asking for clogged vents and messy boil-overs. For expanding foods (beans, rice), stay at or below the halfway mark.
5. Using quick release for beans Beans + quick release = blown-out, mushy beans with separated skins. Always use natural release for legumes.
6. Not sautéing aromatics first You can dump everything in, but building flavor first makes a huge difference. Take 5 minutes to sauté onions, garlic, and spices before pressure cooking.
7. Putting thick sauces on the bottom Tomato sauce, coconut cream, and thick pastes burn easily. Layer: thin liquid first, then vegetables, then thick sauces on top. Don’t stir.
8. Opening the lid too soon If the float valve is up, there’s still pressure inside. The lid is locked for a reason. Wait for the pin to drop.
9. Never cleaning the sealing ring That funky smell? It’s your sealing ring absorbing odors. Remove it after each use and wash with soap. For stubborn smells, soak in vinegar.
10. Being afraid to experiment The Instant Pot is forgiving. Worst case, you overcook something slightly. Best case, you discover a new favorite meal. Don’t let fear hold you back.
For a deeper dive, read my full guide: 10 Instant Pot Mistakes That Are Ruining Your Dinner →
Frequently Asked Questions About Instant Pot
How long does it take for an Instant Pot to preheat?
To preheat instant pot It takes 5-15 minutes depending on how much food/liquid is inside. A fuller pot takes longer. This time is in addition to the cook time shown in recipes.
Can I open the Instant Pot while it’s cooking?
Not during pressure cooking, the lid locks for safety. But you can open it during Sauté mode or Slow Cook mode
What does the burn message on Instant mean?
If you are seeing Burn displayed on instant pot it means the bottom of the pot is getting too hot, usually because there’s not enough liquid or something is stuck. Cancel, release pressure, check the bottom, add liquid, and restart.
Can I cook frozen food in the Instant Pot?
Yes! You can cook frozen food in the Instant Pot. Add 5-10 extra minutes to the cook time. Frozen vegetables, beans, and even frozen veggie burgers work great.
Do I have to use the Instant Pot brand?
No. There are many electric pressure cookers on the market. Instant Pot is the most popular brand, but the principles in this guide apply to most models.
Is it safe to leave the Instant Pot unattended?
Yes, during the pressure cooking phase. The pot is sealed and self regulating. Many people start it and walk away. Just be present for quick release since it involves hot steam
How do I convert slow cooker recipes to Instant Pot?
General rule: reduce cooking time to about 1/4 to 1/3. An 8-hour slow cooker recipe might take 20-40 minutes under pressure. Liquid may need reducing too since less evaporates.
Why does my food cooked in Instant pot taste bland?
Pressure cooking doesn’t reduce liquids like stovetop simmering does. Solution: sauté aromatics first, use less liquid than you think, and season more aggressively. You can also reduce the sauce using Sauté mode after pressure cooking.
You’re Now an Instant Pot Pro – Ready to Start Cooking
That’s everything you need to know to confidently use your Instant Pot. To recap:
- Understand your pot’s parts (especially the sealing ring and valve)
- Master three buttons: Pressure Cook, Sauté, Cancel
- Do the water test first
- Learn when to use natural vs quick release
- Follow safety basics
- Start with a forgiving recipe
- Learn from common mistakes
The best way to get comfortable? Start cooking. Pick a recipe, gather your ingredients, and give it a try tonight.
Ready for your first recipe? → Instant Pot Vegetarian Chili (beginner friendly, crowd pleasing) → Instant Pot Lentil Curry (healthy, simple, delicious)
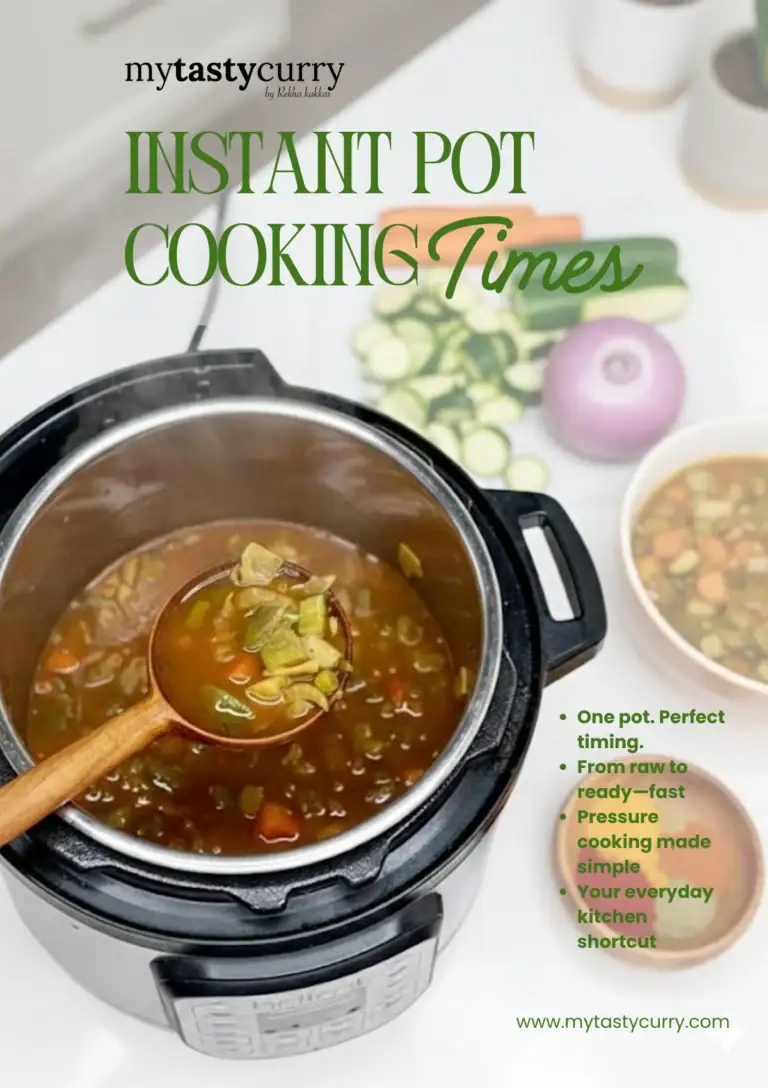
Want a handy reference? → Download My Free Instant Pot Cooking Times Cheat Sheet printable PDF with timing for vegetables, grains, beans, and more.
Download the Free Printable PDF
Get this entire Instant pot cooking times chart as a beautifully designed PDF to print and keep in your kitchen.
Need more recipes? → Browse All Instant Pot Vegetarian Recipes
More Instant Pot Guides
- Natural Release vs Quick Release
- Instant Pot Cooking Times Cheat Sheet (Free Printable)
- 10 Instant Pot Mistakes to Avoid
- Instant Pot Zero Oil Chana Masala
- Best Instant Pot Accessories (What’s Actually Worth Buying)
- Instant Pot Meal Prep: Cook Once, Eat All Week
Last Updated: January 2026 Tested with: Instant Pot Duo 6-Quart, Instant Pot Duo Plus 6-Quart
How to use a new electric pressure cooker for beginners: final steps
You’ve covered the essentials: unbox and inspect the unit, run the water test, learn the buttons and pressure settings, and understand natural, quick and partial releases. Focus on three habits as you practice: run the water test, get comfortable with the controls, and practice pressure release methods. Those habits make cooking safe and predictable and help recipes feel simple rather than intimidating.
If You like this recipe and made it Please rate the recipe. It helps us to reach more people. For the Latest updates Subscribe to Rekha’s Whatsapp. You can follow me on Instagram, Facebook, Youtube, Pinterest for more food inspirations.